
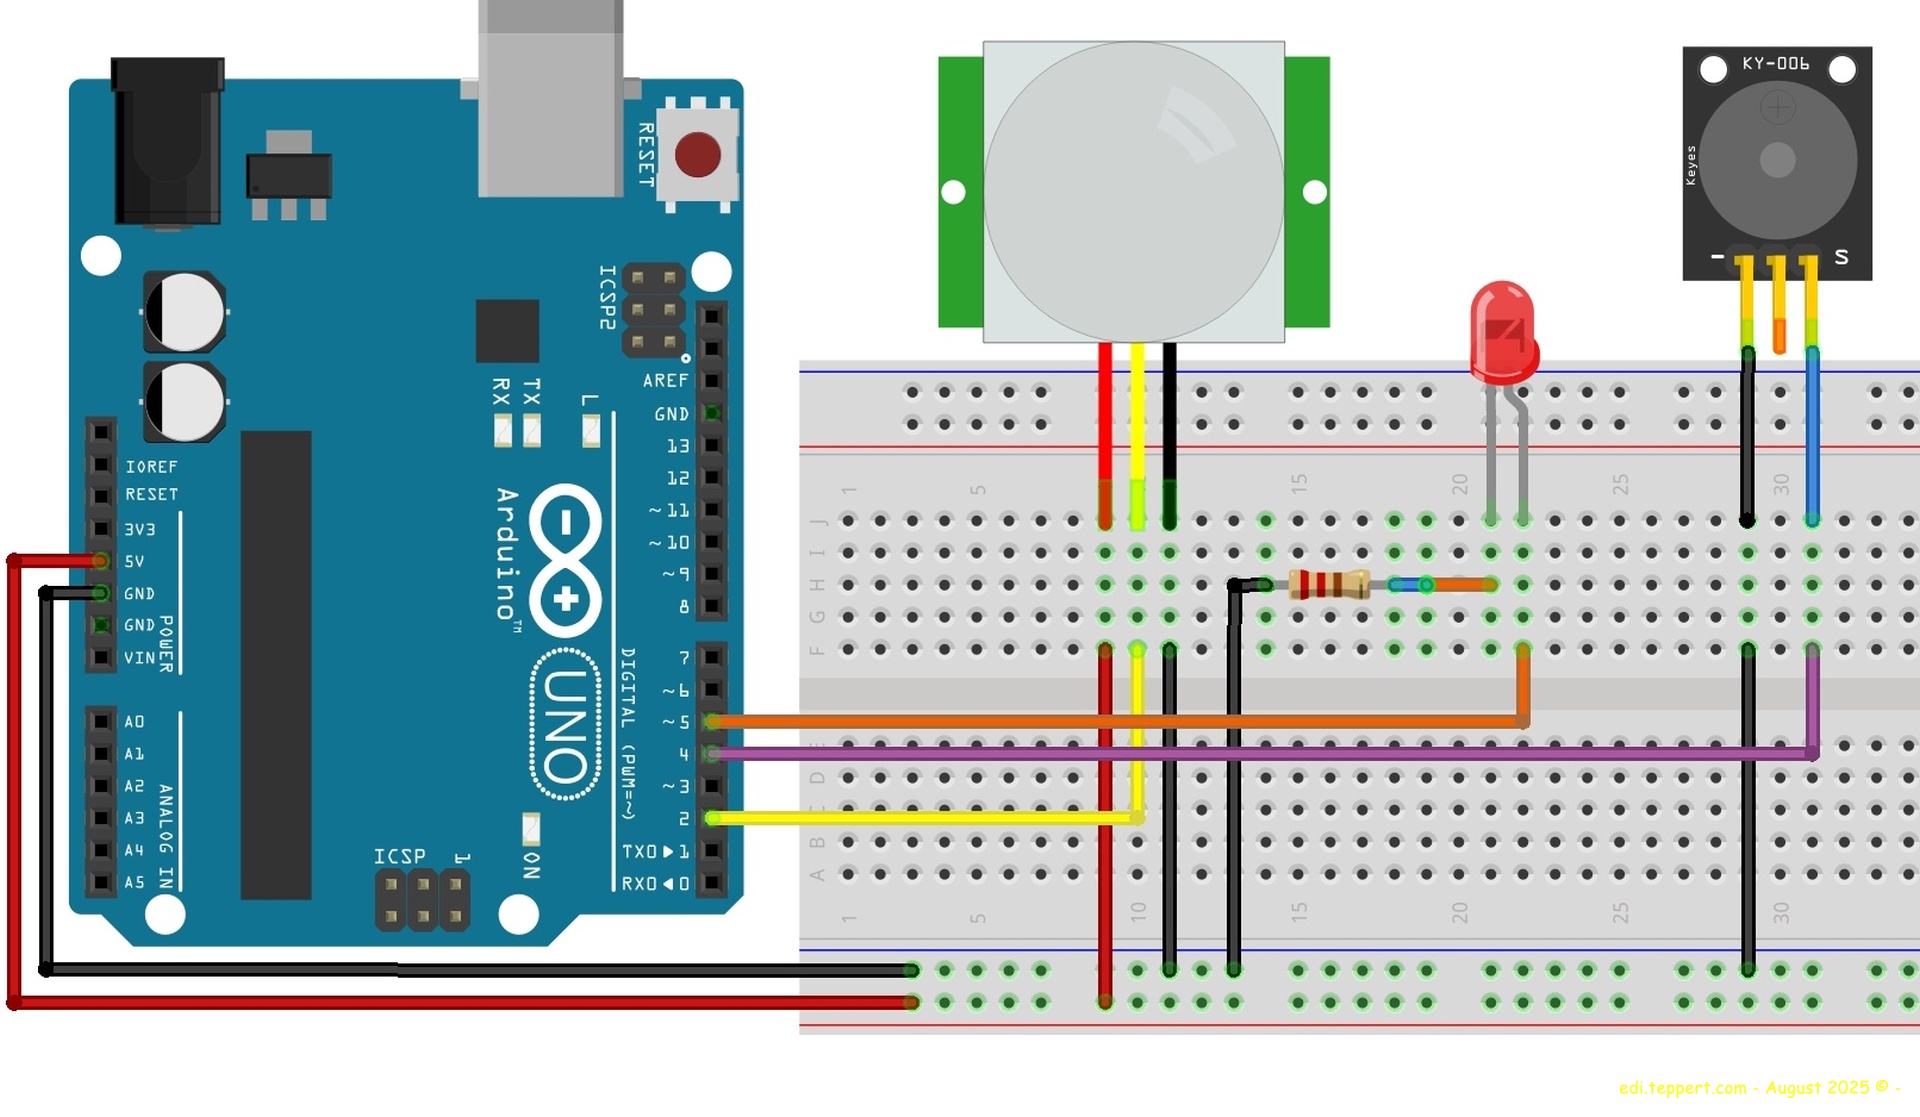
To figure out how to configure an HC-SR501 motion detector, I built a breadboard with a test circuit. This requires an Arduino Uno, the HC-SR501 sensor, an LED, a passive piezo buzzer, a 220 ohm resistor, a power supply or USB Cable to power the Arduino, and some jumper cables.
On the Arduino you have to Upload the cpp Code from the INO-File to switch the Buzzer and the LED on and off when Motion ist detected.
I put the whole thing together in Fritzing, and it’s available here also as an fzz file for download.
The HC-SR501 motion detector has two potentiometers for setting values:
1.) Sensitivity (SENS) → controls the range (~3m to ~7m)
2.) Time delay (TIME) → controls how long the OUT pin remains HIGH (from approximately 2 seconds to several minutes)
With the test setup, a suitable value can be determined for what you ultimately want to build by changing the potentiometer setting.
Have fun trying it out and modify it for your own Requirements!
Best regards,
Edi
CPP-Code for programming the Arduino One
(INO-File Downlod here):
const int pirPin = 2; // HC-SR501 Ausgang
const int ledPin = 5;  // LED Pin
const int buzzerPin = 4; // Summer Pin
int pirState = LOW; // Aktueller Zustand des PIR Sensors

void setup() {
  pinMode(pirPin, INPUT);
  pinMode(ledPin, OUTPUT);
  pinMode(buzzerPin, OUTPUT);
  Serial.begin(9600); // Für Debugging
}

void loop() {
  pirState = digitalRead(pirPin);

  if (pirState == HIGH) {
    digitalWrite(ledPin, HIGH);
    digitalWrite(buzzerPin, HIGH);
    Serial.println("Bewegung erkannt!");
    delay(1000); // Kurze Pause
    digitalWrite(ledPin, LOW);
    digitalWrite(buzzerPin, LOW);
    Serial.println("Pause...");
    delay(2000); //  Eine längere Pause
  }
}

HC-SR501 Sensor in Progress


